• Facebook
    • Google+
    • Twitter
    • Get new posts sent to your inbox!
      Enter your email address below:

  • Monday, January 28, 2013

    Cleaning Clothes in the Backcountry

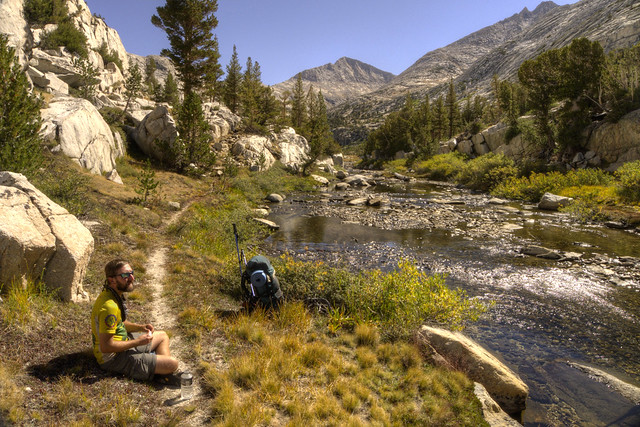
    "Alright," I said to Lightfoot on our John Muir Trail hike in 2012. "Smell this sock again and tell me if the baking soda made any difference." The sour look on his face gave me the answer as he slowly handed the sock back to me.

    After a while on a long distance hike, you start to lose your ability to smell yourself, at least to a certain point. This is a blessing when you're alone, otherwise it's a curse. It would be great if I was a cartoon and could just look up to see if there were stink lines drawn above my head, but sadly I'm not, so Lightfoot offered to smell my socks after a thorough rinse and again after they had soaked in a baking soda and water solution for thirty minutes. Only a true friend would take a bullet like that.

    "Hmm, alright, next time I'll let it soak longer or add more baking soda."

    I began experimenting with environmentally-safe ways to clean my clothes in the backcountry after hiking the Appalachian Trail. Since I started backpacking, I've pretty much started to define "clean" as "dry," so don't get me wrong, clean out there isn't the same thing as clean at home. I decided, however, that long-distance backpacking would be more enjoyable if I could feel cleaner. Being tranquil and at peace in the natural world is a lot easier if you don’t smell like a corn chip’s foot. That's why cleanliness is next to godliness, and why you haven't seen a drawing of Buddha with stink lines above his head.

    First, I pack a recycled plastic bread bag or a one-gallon Ziploc and at least 2 tablespoons of baking soda. Since I'm usually only washing one or two pairs of socks, a pair of underwear, and a lightweight shirt at one time, the bread bag or Ziploc is big enough.

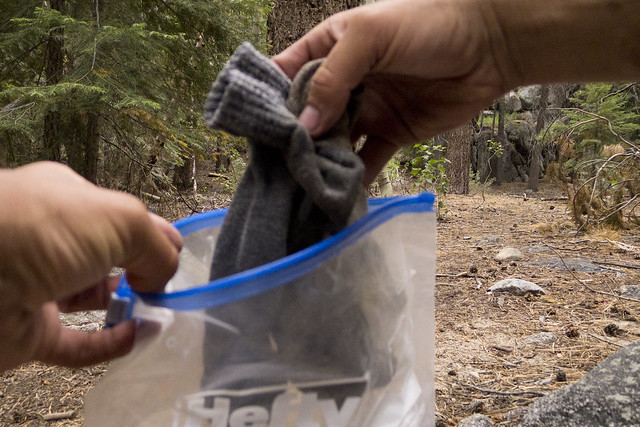
    1. After setting up camp at the end of the day, I put the offending clothes into a one-gallon Ziploc bag.
    2. Then I add water.

    Don't put the clothes directly in the water source. Clothes hold residual detergents from previous washes, which you may see proof of in the form of suds during the next step. Clothes may also contain other chemicals from deodorants, bug sprays, etc. Consider putting your backpacking clothes through another rinse cycle after you've washed them at home.
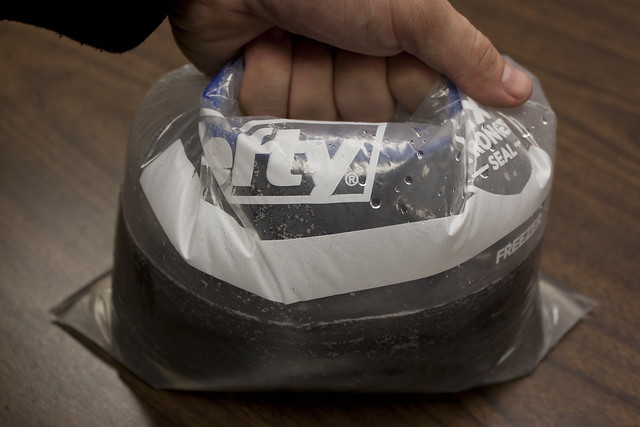
    3. Seal the bag with a little bit of air inside. Now, shake it vigorously. This is where most of the cleaning happens, and the longer you agitate the clothes the cleaner they'll get.
    4. Make sure you're at least 200 feet from all water sources then empty the bag and squeeze as much water out of the clothes as you can. Avoid twisting wool and synthetic fabrics when wringing out the water. It's less damaging to roll them up and squeeze the water out.

    Repeat steps 2 through 4 as often as necessary. I usually do it 3 to 5 times, and agitate for at least a couple minutes each time.

    This alone will make a tremendous difference, and more so the longer you agitate and the more times you replace the water as you do it. Your clothes will be a lot less smelly, and a lot more comfortable to wear. Actually, if your clothes weren't that dirty to begin with, water and agitation would probably be enough to get them clean. After wearing the same clothes on the trail for a couple days, however, they'll probably still smell at this point, but hey, at least people won’t be able to smell you from ten feet away.

    If you want to stick with slightly smelly clothes to save weight in your pack and have as little impact on the environment as possible, feel free to skip the next two steps. If you want to get them cleaner, however, it's time to get out the baking soda.
    5. If you want to remove a stain, mix a little water with baking soda to make a paste, apply it to the stain, gently rub the stained fabric into itself, and then continue.
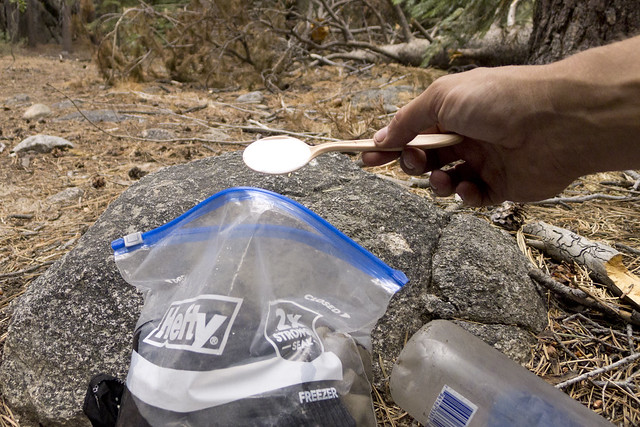
    6. Fill the bag with about a quart of water and about 2 tablespoons of baking soda (more on why I don't use detergents below). Shake vigorously to mix. If you need more water to cover your clothes, just increase the baking soda as well by roughly that same ratio. It doesn't have to be exact.

    Now, let that soak overnight.
    7. In the morning, go about 200 feet from all water sources, squeeze the baking soda water out the clothes, and then rinse them in the same way as steps 1 through 4.
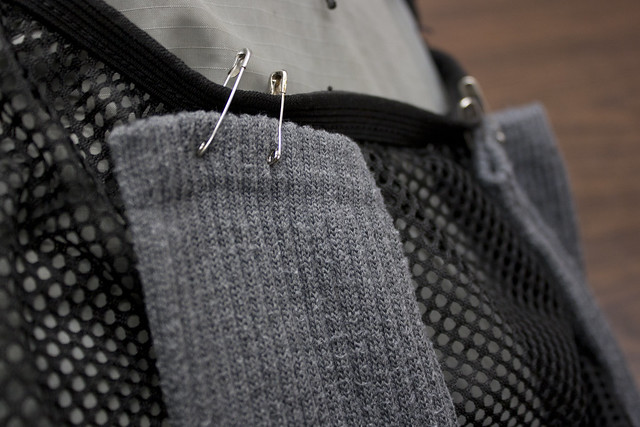
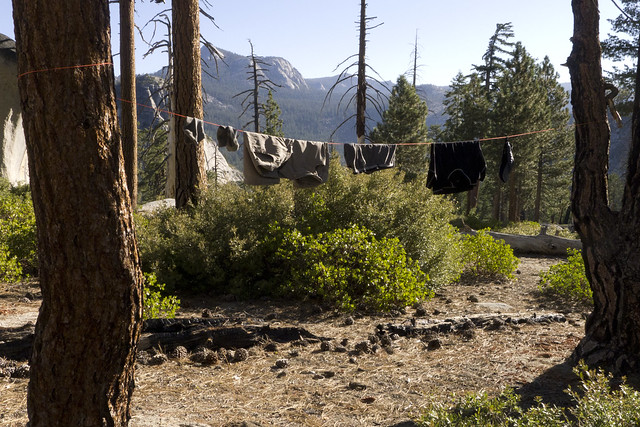
    8. I attach the wet clothes to my backpack using safety pins, so they can dry while I hike. If it's warm enough, I'll just wear the shirt wet. The synthetic or merino wool fabric my shirts are made of dry quickly from body heat.
    Safety pins also work great to hang clothes on a line, so wind doesn't blow them off and so you don't have to fold them over the line, which makes them take longer to dry.

    The odors will continue to decrease as your laundry dries in the sunlight.
    9. And finally, go find Lightfoot and have him sniff your sock to see if it worked.

    More Uses for Baking Soda


    Before I go into why I don’t use detergents in the backcountry, one reason I take baking soda instead of the other alternatives is it's useful for other things on the trail. For example:

    1. You can mix some baking soda and a little water in the palm of your hand to form a paste and use it as a gritty hand and foot scrub to remove dirt and odors.

    2. Relieve the itch of bug bites, bee stings, or Poison Ivy by applying the baking soda paste like a salve onto the affected skin.

    3. You can scrub cook pots with that baking soda paste solution, as well. Or just sprinkle some on a damp bandanna and scrub away.

    4. The paste can also be used to brush your teeth. It doesn't contain fluoride, but it makes a decent toothpaste if you run out.

    5. You can also dissolve a teaspoon in 4 ounces of water to make a mouthwash. Slosh it around in your mouth to get rid of bad breath or relieve canker sore or tooth pain.

    6. Dust some under your arms and on your feet to use it as a deodorant. Not a good alternative if you're going on a date, but it helps a little bit on the trail.

    7. You can cool a sunburn, windburn, or other minor burns or rashes by saturating a bandanna in a warm water and baking soda solution and gently dabbing it onto the affected area.

    8. Supposedly, you can rub dry baking soda on your roots to degrease your hair, and then just towel out the excess after 1 to 3 minutes. I haven’t tried this yet, but I have heard of people doing it.

    9. Sprinkle some dry baking soda on your dirty clothes so they don’t stink up your whole backpack.

    10. Relieve a sore throat by gargling a mixture of ½ teaspoon of baking soda and ½ teaspoon of salt with a ½ cup of warm water a few times a day until it’s gone.

    That's a lot, but I'm sure there are many other uses for baking soda on the trail.

    Why I Don’t Use Detergents

    I'm not totally opposed to people using certain environmentally-friendly biodegradable detergents, but I'm just not convinced any are 100% safe. I prefer to keep as many chemicals out of the backcountry as possible and baking soda is useful in so many other ways.

    If you prefer to use a detergent, there are some that are considerably safer for the environment, and safer ways to use them.

    First, there are no detergents safe enough to dump directly into a water source, even if the detergent's label has a bright blue sky and green leaves on it, and you can only buy it in a locally-owned co-op from a barefoot hippie drenched patchouli oil. Always dump the wastewater into a 6 to 8” deep hole dug at least 200 feet from a water source, and use it sparingly.

    It’s hard to tell which detergents are the safest to use because they don’t have to disclose all ingredients on the label. So, choose a detergent based on what they claim they don’t add. They don't have to legally tell you if it does contain certain things, but false advertising is still illegal (sort of). For example, look for detergents that are phosphate-free, chlorine-free, fragrance-free, dye-free, and ones that are plant-based and contain no petroleum solvents.

    Fragrance-free is also important because it can attract animals, but also because companies may be able to hide certain chemicals in their fragrances and still legally claim the product is free of it. (As of this post, that is the case, but there is a proposed law in the US that may change that soon.)

    Biodegradable Soap

    Also, in addition to the advice above, only use biodegradable detergents. Just remember that no soap is biodegradable in water. Biodegradable soaps are only biodegradable when buried in the soil.

    Spend enough time on the trails and you'll eventually hear something like, “I have biodegradable soap, so I just jump in the lake to bathe.” If that is how you’re using it, it’s not biodegradable soap. If biodegradable soap accumulates in water sources, it can lead to excessive plant and algae growth and decrease dissolved oxygen in the water.

    To print biodegradable on a label, the product just has to be “capable of being decomposed by biological agents, like bacteria, fungi, or algae, and break down into carbon dioxide, water, and biomass in a reasonable amount of time in the natural environment.” Further, it could take up to six months to biodegrade in the soil, and still be deemed biodegradable. By then, if not properly buried at least 6" in the soil and 200 feet from a water source, it could work itself into the aquatic ecosystem.

    Biodegradable soap is a good example of the cobra effect, when an attempted solution to a problem actually makes the problem worse. Overall, biodegradable soaps are a good thing. They are technically much better for the environment, but because the term is often misunderstood, the product is often used in an environmentally unfriendly way. So, a product with good intentions can actually end up being worse for the environment.

    It’s like being okay with producing more garbage, because you recycle, or leaving an energy-efficient light bulb on more often because it uses less energy.

    Also, since there is an assumption that it is safe for the environment, some people may end up using more of it than they would otherwise. With the method above, a couple drops is all you need.

    Here are a few other tips for keeping your clothes clean in the backcountry:

    1. You can reduce odor and the number of times you have to wash your clothes, if you wear clothes made of merino wool. It doesn't absorb body odors or hold onto bacteria like most synthetic fabrics, like those used in Under Armor for example.

    2. Choose clothing made of materials that will dry fast in the sun. Hiking clothes made to quickly wick moisture from your body will likewise dry fast in the sun after you wash them.

    3. If it's overcast and your socks are still a little damp at the end of the day, put them in your sleeping bag at night. Your body heat will help dry them out.

    4. Before heading to the trail, wash your clothes at home with just water. This will remove residual detergents and make it safe to jump in a lake with your clothes on to give them a quick wash.

    Let me know if you have any questions, concerns, or suggestions by emailing me at ryan@abackpackerslife.com.

    Monday, January 21, 2013

    My Gear Checklist: Sleeping Pad

    Therm-a-Rest NeoAir XLite Sleeping Pad
    12 oz.

    Is it just me, or does that picture make you also want to be backpacking? This series of gear posts have partially been to show how inexpensive backpacking can be, but this is one item where I was able to silence my typical thriftiness. The comfort of that yellow sleeping pad contributed a lot to that sunset in Badlands National Park.

    So, whether I'll be sleeping in a tent, hammock, or shelter, I bring along a sleeping pad. In the hammock, it's more for insulation than comfort, so if it's very warm, I can go without it. Otherwise, it's always with me.

    Since I've been spending such a large percentage of my year sleeping on the ground, I justified buying the most expensive sleeping pad there is, the Therm-a-Rest NeoAir XLite. I didn't actually fact-check that statement, but I've never seen anything more expensive. It was especially expensive when compared to my first sleeping pad, a $6 piece of blue closed-cell foam from Wal-Mart.

    If you're looking to save money, definitely start out with a blue foam pad (8 - 12 oz.) or something slightly better like the $35 Therm-a-Rest ZLite Sol (10-14 oz.)

    Before my first trip, I cut the blue foam mat down to torso length, to reduce its weight to 8 oz. That got me by just fine on my first few backpacking trips, but I didn't sleep very well and woke up with a sore back. Once I realized I was in love with life on the trail, and knew I would be doing a lot more of it, I decided to upgrade to a torso length Therm-a-Rest ProLite (11 oz.) for around $80.

    Later, I realized that torso-length pads with my legs hanging off the end made me colder at night, so I needed a warmer sleeping bag to compensate. That meant I wasn't really saving much weight. So, I regretted that purchase.

    Since I'm cheap and reluctant to add more ounces to my pack, I stuck with that pad for a few years. Until one morning when I woke up to the sound of a dog chasing a cat.

    I had been couchsurfing with someone in Vermont when hiking the Long Trail. I felt her dog and cat run across me and my sleeping pad. I fell back to sleep, but a few minutes later, woke up again when I realized I was on the hard floor. The animals poked a hole in the pad. I didn't care, though. One, I loved her happy dog and believed it could do no wrong, and two, I finally had my excuse to upgrade.

    The NeoAir XLite weighed about the same (12 oz.), but was full length, three times as thick, and looked way more comfortable. Then I saw the price tag.

    "Oh snap, $160!?" What follows is a dramatization, loosely based on my actual decision-making process.

    The figurative angel and devil popped up on my shoulders, "Ryan, you're spending most nights outside, this is your bed now. It's okay to spend money on it," said the devil.

    "But Ryan, you're not working right now, you can't spend that kind of money," said the angel, who had a point.

    "Good sleep is better for your health," the devil interjected. "You'll be happier and live longer if you start sleeping better."

    "But it's $160, that's more than you spent on your real bed," said the know-it-all angel SOB who suddenly didn't seem to care about my well-being.

    "This cozy and warm NeoAir has an R-Value of 3.2, one more than your old sleeping pad," the brilliant devil said. "And it's only one ounce heavier than your other Therm-a-Rest, that you regretted buying, the one you wasted $80 on. You want to waste even more money by buying something else you won't like?"  The devil just about had me convinced with the idea that I would be wasting money. He used my cheapness against me.

    "And," he continued, "The NeoAir XLite packs down to the size of a Nalgene bottle, that's simply unprecedented. We need this sleeping pad. Ryan..." He leaned closer to my ear and whispered, "We deserve this sleeping pad."

    He was right, of course.

    "But Ryan," said the angel who, foreseeing defeat, collapsed to his knees and began to beg. "We could just patch your old one for next to nothing..."

    "Oh shut up, angel, nobody likes you!" Which I'd like you to pretend I whisper yelled to my empty shoulder in the crowded outfitter. "And honestly, angel, I'm starting to question the very point of you? We need this to be happy and healthy, don't you see? It's as though you want us to die sad and bitter, because that's exactly what will happen if we don't buy this."

    Betrayed and alone, the angel vanished. I made my way to the checkout.

    And... Scene.

    Back in reality, what followed were weeks of buyer's remorse. The thickness of the pad seemed almost uncomfortable at first, and I missed the days of being able to throw my sleeping pad on the ground to sit on, without worrying about getting a hole in it.

    Every night, I was on the ground fastidiously removing every sharp rock before setting up my tent. I didn't exactly resemble Rick Moranis searching in his backyard for his tiny children in 'Honey, I Shrunk the Kids', but sadly, I can't say it wasn't similar.

    Eventually, I forgot about the money and realized I didn't have to be so careful with it. For its thinness it holds up pretty well. I also started using the sit pad that doubles as the back padding of my Mariposa Plus backpack, so I still have a worry-free thing to throw on the ground to sit on without adding more ounces.

    On my first night below freezing, I realized how much warmer I was. And once I figured out the right amount of air to blow into it for maximum comfort, I did sleep much better. For the first time, I could sleep through the whole night without waking up once.

    And so, I lived happily ever after. The End.
    M Y   G E A R   L I S T

    • Backpack
    • Backpack Liner
    • Shelter
    • Sleeping Bag
    Sleeping Pad
    • Cooking Supplies
    • Food
    • Food Container
    • Water Treatment
    • Clothing
    • First Aid & Toiletries
    • Hand Sanitizer
    • Ziploc for Laundry
    • Baking Soda
    • Bandannas
    • Headlamp
    • Ziploc Wallet
    • Lighter and Matches
    • 50' of Paracord
    • 15' Braided Mason's Cord
    • Bug Repellent
    • Camera
    • All-Weather Journal
    • Space Pen (Refill)
    • Map & Compass
    • Book
    • Cell Phone
    • Knife
    • Duct Tape
    • Extra Ziploc bags
    • Trekking Poles
      
    Creative Commons License
    A Backpacker's Life List by Ryan Grayson is licensed under
    a Creative Commons Attribution-NonCommercial-NoDerivs 3.0 Unported License.
      

    Saturday, January 19, 2013

    My Gear Checklist: Sleeping Bag

    Sleeping Bag
    26 - 45 oz.

    One morning on the Appalachian Trail, Liv woke up and said, "I can't wait until the day is over so I can get back into this sleeping bag." She hadn't even gotten out of it yet. I mention that to illustrate how great a great sleeping bag can be.

    I carry one of two synthetic bags. A lightweight 40°F bag in the summer that weighs 26 oz., and if temperatures could get colder than that, I take a 15°F bag, which weighs 45 oz.

    Note: I fill my sleeping bag stuff sack with extra clothes, rain gear, bandannas, or any other soft gear I'm not using that night, to make a pillow.

    If you can't afford two sleeping bags starting out, a 30°F - 35°F bag is a good compromise, and you can always add a sleeping bag liner to reduce the temperature rating an additional 8 - 15°.

    S L E E P I N G   B A G   L I N E R S

    If a 30° bag isn't going to be warm enough on a particular trip, and don't want to spend a couple hundred dollars on a second sleeping bag, for about $50 - $60 you can get a sleeping bag liner and subtract up to 15°F from your bag's temperature rating. I'm currently working on making my own for a fraction of this cost, more on that later.

    They offer other benefits as well. Liners are more comfortable against your skin than the typical sleeping bag nylon or polyester. They will minimize wear and keep your bag cleaner. A liner can be washed separately, reducing the number of times you have to wash your sleeping bag. Washing can compress your bag's insulation and make it considerably less warm. Not to mention cause even more wear and tear. In other words, a liner can save money in the long run by extending the life of your sleeping bag.

    And if you're camping in very warm weather, you can leave the bag at home and just sleep inside your lightweight 8 oz. liner.

    T E M P E R A T U R E   R A T I N G S

    When deciding on which temperature rating you'll need, remember that manufacturers assume you are wearing a layer of thermal underwear and laying on a sleeping pad. And since metabolisms vary, and the rating methods vary from one manufacturer to another, temperature ratings are only a guide. If you're a cold sleeper, if you're not staying in a tent, or you're not using a well-insulated sleeping pad, you'll probably want to add at least 10-15 degrees to the rating.

    W H Y   I   U S E   S Y N T H E T I C   O V E R   D O W N ?

    Because I'm cheap. I'm not proud of that, but I am what I am. Down bags are much lighter than synthetic, so I would love to have one, but the weight savings comes at a significantly higher cost.

    When trying to get my pack weight lower, I made a list of all my gear that I knew could be lighter. Then I figured out how much it would cost to replace each item and how many ounces it would save. (Yeah, I used an Excel Spreadsheet. I can't decide if I should be ashamed of this attention to detail. You could say this is either smart or borderline obsessive compulsive and I'd agree with you either way.) Next, I sorted the list by highest weight savings per dollar and slowly replaced those items first. Replacing my sleeping bag was near the bottom of that list, so I haven't replaced it.

    Rather than admit my cheapness, I could have told you I go with synthetic because a down bag won't dry as fast and will lose 90% of it's thermal properties if it gets wet, which is definitely true, but so far, I've never gotten one wet. I keep my sleeping bag in a water-resistant stuff sack in addition to the two trash compacter bags that line my pack. I could drop it in a lake and it should stay dry.

    So, yeah. The real reason I use a synthetic bag, is that they are much cheaper. I found my 40° bag on clearance off-season at Backcountry.com for $38, not bad for a 26 oz. bag. If I wanted to spend 10 times more than that, I could have bought a high quality down bag and saved 10 or 11 ounces, but I have a hard time justifying that.

    My 15° synthetic bag cost about $170 and weighs 2 lbs. 13 oz. When I'm able or willing to spend 2-3 times that amount on a 15° down bag, I'll be able to shave a pound off the weight. Again, I haven't been able to convince myself to do that yet.

    O T H E R   F E A T U R E S   T O   C O N S I D E R

    Sleeping pad sleeve - I haven't used a bag with this feature yet, but it intrigues me. Some sleeping bags have the underside insulation removed and replaced with a sleeve for your sleeping pad. It has the added benefit of preventing you from rolling off your sleeping pad at night, which can make you cold and interrupt your much needed sleep.

    Zipper compatibility - If you're backpacking with your significant other, you can purchase sleeping bags that zip together to form a two-person sleeping bag, but still use them separately too.

    Finally, I won't recommend specific sleeping bags because there are so many great ones that will work just fine and I can't try them all. I'll just say that you're doing fine if your summer bag weighs less than 2 lbs, and your cold weather bag weighs less than 3. Also, if you're new to this and reluctant to use a mummy bag. Remember they are warmer for the weight. When I bought my first mummy bag I thought I would feel claustrophobic, but I quickly got used to it. 
    M Y   G E A R   L I S T

    • Backpack
    • Backpack Liner
    • Shelter
    Sleeping Bag
    • Sleeping Pad
    • Cooking Supplies
    • Food
    • Food Container
    • Water Treatment
    • Clothing
    • First Aid & Toiletries
    • Hand Sanitizer
    • Ziploc for Laundry
    • Baking Soda
    • Bandannas
    • Headlamp
    • Ziploc Wallet
    • Lighter and Matches
    • 50' of Paracord
    • 15' Braided Mason's Cord
    • Bug Repellent
    • Camera
    • All-Weather Journal
    • Space Pen (Refill)
    • Map & Compass
    • Book
    • Cell Phone
    • Knife
    • Duct Tape
    • Extra Ziploc bags
    • Trekking Poles
      
    Creative Commons License
    A Backpacker's Life List by Ryan Grayson is licensed under a Creative Commons Attribution-NonCommercial-NoDerivs 3.0 Unported License.   

    Thursday, January 17, 2013

    My Gear Checklist: Backpack Liner

    Two Trash Compactor Bags
    3 oz. each

    No rain cover will keep your gear dry in a downpour, so I don't bother carrying one anymore. Water is insidious, it will find a way in. A bag liner is much more effective. And it's cheaper and lighter.

    I use trash compactor bags because they are thicker than regular trash bags. I use two in case one gets a hole in it, but also because I use them for other purposes at camp.

    When using a tent or cowboy camping under the stars, I use two as a ground cloth. When sleeping in a hammock, I'll lay one on the ground beside the hammock to stand on when changing clothes or when getting in and out of my sleeping bag.

    I sometimes use the other bag to store all my gear in at night to keep it dry or to waterproof my food bag hanging in a tree.

    Pack Rain Cover
    A pack rain cover will cost $25 - $40, but if you want your gear to stay dry, you'll still need to line your pack, or use several dry bags which can cost $10 - $30 each. I bought a pack of trash compactor bags for $10 in 2006 and didn't use them all until 2012,  and my gear has never gotten soaked. So, if you're looking to save money, this is an easy way to do it without reducing any comfort, convenience, or safety.

    When I want more protection for more sensitive items, like a digital camera, or when I want to keep small items organized like my first aid kit, I use Ziploc Freezer Bags with the double seal. Avoid generics, Hefty brand zip locks, or any bag with the zipper top, they can't be trusted. ZipLocs are cheaper and lighter than dry-bags, especially lighter than clear dry-bags, but admittedly, ZipLocs are not as environmentally-friendly, so someday I may switch. That being said, nothing is better for the environment than a population that has developed a deep fondness for the outdoors. If finding ways to save money gets more people to try backpacking, then I believe in the long run we'll all be doing more to protect it.

    At least that's what I tell myself to reduce any eco-guilt.

    Anyway, enough preachiness, every once in a while I get a small tear in the liner, as you're probably assuming, but it doesn't happen often. When it does, I patch it up with a small piece of duct tape, which I always have wrapped around my trekking poles.

    One final note, if using trash compactor bags for a ground cloth, be sure to fold in the parts of the trash bag that stick out under your tent. Otherwise, it will divert rain water under your tent, which defeats some of it's purpose.

    M Y   G E A R   L I S T

    • Backpack
    Backpack Liner
    • Shelter
    • Sleeping Bag
    • Sleeping Pad
    • Cooking Supplies
    • Food
    • Food Container
    • Water Treatment
    • Clothing
    • First Aid & Toiletries
    • Hand Sanitizer
    • Ziploc for Laundry
    • Baking Soda
    • Headlamp
    • Ziploc Wallet
    • Lighter and Matches
    • 50' of Paracord
    • 15' Braided Mason's Cord
    • Bug Repellent
    • Camera
    • All-Weather Journal
    • Space Pen (Refill)
    • Map & Compass
    • Book
    • Cell Phone
    • Knife
    • Duct Tape
    • Extra Ziploc bags
    • Trekking Poles
      
    Creative Commons License
    A Backpacker's Life List by Ryan Grayson is licensed under a Creative Commons Attribution-NonCommercial-NoDerivs 3.0 Unported License.   

    Tuesday, January 15, 2013

    What I Carry With Me Out There

    My first set of gear, all of which has been replaced
    One of the great aspects of the backpacking life, is the freedom you feel when you only have what you can carry on your back. I get asked what I have on mine quite a bit, so below you'll find my list. It's amazing what you can live without.

    Today, I'll just talk about the backpack, but eventually I'll post about each item. I'll give advice for buying gear, suggest tips for saving money, and in some cases, give detailed instructions on how to save money by making your own gear.

    Most of my advice will be for new backpackers (especially those wanting to save money on their first set of gear), because with experience your gear gets modified and minimized until it is unique to your own comforts and needs. Mine certainly has evolved over the years.

    Nevertheless, I hope I can also give a few ideas to a seasoned pro to consider or criticize. Please leave any thoughts and suggestions in the comments below.

    Mariposa Plus, by Gossamer Gear
    26 oz.
    I purchased two other packs before finally settling on the Mariposa Plus, by Gossamer Gear. There are a couple ways to save money on a pack, but none would have saved me more than getting more experience before buying my first one. My problem was that I didn't have a friend with a pack to borrow and I didn't lived near an outfitter that rented out gear (such as REI).

    My first mistake was buying my first pack online. Since I didn't have an outfitter nearby, I didn't get fitted or get to try on multiple packs. Consequently, the pack didn't fit right and I didn't have enough experience to even realize that was the problem. All I knew was, after my first three miles, my shoulders were already getting sore and I was wondering what I got myself into.

    All packs will seem comfortable when empty, so a good outfitters will give you sand bags to put inside the packs to simulate the full weight and will be able to tell you if it's fitted properly.

    For my second pack, I drove ninety minutes to the nearest outfitter. It fit much better this time, but after a few trips I decided to reduce my gear weight and found backpacks that were 2 lbs. lighter, but just as comfortable. That's important to remember when looking for an ultralight pack. A one-pound backpack, with a total packed weight of 21 pounds, might be less comfortable than a five-pound backpack with a total weight of 25 pounds. Lightweight is important, but not more important than comfort.

    Also, the comfort of a pack will drop the heavier it is. That might go without saying, but generally an ultralight pack will not hold more than 25 - 30 lbs. comfortably. Make sure to put enough sand bags in when testing one out. It might feel great at 25 lbs., but terrible at 35.

    So, finally, three packs and $550 later, I had a pack I was happy with.

    B U Y I N G   O N L I N E

    If you're lucky enough to have a knowledgeable local outfitter, who can answer all your questions, it's well worth it to support that business. That being said, there are a couple benefits to buying a backpack online other than finding a better price and seeing a wider selection.

    The first that comes to mind is that I haven't yet seen a backpack in an outfitter that has an interchangeable suspension system. With some online companies, like Gossamer Gear and ULA Equipment, you can customize your backpack by selecting different size hip belts, torso lengths, and shoulder straps. If you're like me, and nothing seems to fit exactly right, you may find it beneficial to be able to order a pack with a large torso length, let's say, but have them attach their medium-size hip belt.

    Also, many online outfitters have pages devoted to sales and clearance items that you can check periodically for deals, such as these pages at REICampmor, and Backcountry.com.

    When buying online, checkout the return policy. REI, for example, will let you return any item for almost any reason, even if you have used it on the trail. If you live near an REI, or any store with a similar policy, that's a good place for a beginner to start.

    B U Y I N G   U S E D   G E A R

    Expect to spend at least $125 - $250 on a backpack, if you buy new. If that's not an option for you, start by looking for a used pack. Many people buy backpacking gear, but after one or two trips find out it isn't for them and want to recoup some of their money. It's like exercise equipment, you can find good deals on barely used items. Many outfitters sell used gear in their stores, or you can find a lot of used packs online at sites like GearTradeeBay, or Craigslist.

    When looking for used gear, remember that many outdoor gear companies will repair their products for free, for life. If you find a good deal on a pack with some kind of defect, call the manufacturer and see if they'll fix it for free. I recently sent a backpack to Gregory Packs that had a pretty major flaw, a torn zipper that left a giant hole exposed. I suspected this would be covered under their lifetime warranty and it was. They fixed it free and sent it back. It only cost me $4 in shipping. Some people don't want to mess with the return process, or don't even know their pack has a lifetime warranty. Take advantage of that if you can.

    G E T T I N G   A   P R O P E R   F I T

    If you're unable to get to a good outfitter to be sized properly, or if you'll be buying online, here's how to fit yourself for a pack.

    First, get your torso length. Have a friend measure your spine between two points. The starting point is your C7 vertebra (the vertebra at the base of your neck that protrudes when you touch your chin to your chest). Next, imagine a horizontal line on your lower back going across the top of your hips (the Iliac Crest). Where this line intersects with your spine is the ending point for your measurement. If you're like most adults, your torso length will fall between 16 and 22 inches.

    Next, measure around your waist at the top of your hipbones. Those two measurements will get you close to a perfect fit, without having to try it on before ordering.

    There are other factors that you still won't know before trying it on, though. For example, how it feels with a full weight, the placement of shoulder straps, or the location of side pockets, which you want to be able reach without taking off your pack. Check out the return policy before ordering and if something isn't right, send it back. Losing a few bucks in return shipping is much better than being uncomfortable on the trail.

    C A P A C I T Y

    I didn't want to get into specific pack features on this post, because everyone has their preferences. There is one more thing you'll want to consider when buying your first pack, though, the total capacity. This is largely a personal preference as well, but a beginner might wonder how big is big enough. For me, 3,600 cu. in. (Or 59 L) of total capacity, is the right combination of being large enough to fit what I need, without being so large that I'm tempted to carry something I don't need. I can fit all my gear and a week's supply of food.

    That's it for now. Don't forget to leave your comments or suggestions below!
    M Y   G E A R   L I S T

    Backpack
    Backpack Liner
    • Shelter
    • Sleeping Bag
    • Sleeping Pad
    Cooking Supplies
    • Food
    • Food Container
    • Water Treatment
    • Clothing
    • First Aid & Toiletries
    • Hand Sanitizer
    • Ziploc for Laundry
    • Baking Soda
    • Bandannas
    • Headlamp
    • Ziploc Wallet
    • Lighter & Matches
    • 50' of Paracord
    • 15' Braided Mason's Cord
    • Bug Repellent
    • Camera
    • All-Weather Journal
    • Space Pen (Refill)
    • Map & Compass
    • Cell Phone
    • Knife
    • Duct Tape
    • Extra Ziploc bags
    • Trekking Poles
      
    Creative Commons License
    A Backpacker's Life List by Ryan Grayson is licensed under a Creative Commons Attribution-NonCommercial-NoDerivs 3.0 Unported License.